Non opening e46 door

After about a year of having the 330, the drivers door got harder to open, more so in the cold.
As many I tried the trick of loosening the Allen bolt at the side of the lock and then re tightened it. It worked a little, but wasn't ideal. Then one day it totally made no difference and the door failed to open from the outside. It still opened from the inside so when I had a passenger I'd Ask them to open it. When I was on my own however, I had to hold the open button on the key to open the windows and put my arm inside to get to the I side handle.

Well mot time is next week so it's an instant fail if you can't get in the door from the outside.. Time to take action.

There are a couple of options,

Take it to the garage to fix.... £££'s
Get a new lock or one of eBay... Not a bad option, about 50 of the queens finest
Take it out and try to fix it... Cost, lots of stress....

I opted for the latter option.

This isn't a walk through guide but how I fixed my door and a few tips.

First of all, remove the door card, there are many a guide for this, one is :

Then remove the bit of sound deadening from around the door lock side of the door.

Unbolt the top and bottom window runner bolts on the right side. Then using a reverse torx or a deep reach 5.5mm socket,  remove the bolt on the bit that holds the window in.

Next I removed the outside lock and handle.

Then I removed the 3 bolts holding it in place.

Keeping hold of the lock, it will drop down. Unplug the electric plug from it.

The next step involved pushing the window runner away from the lock, a lot of swearing, sweat, blood and grazes and finally manovering out the lock from a tight gap.

Now the fun begins.

Straight away I could see the problem..

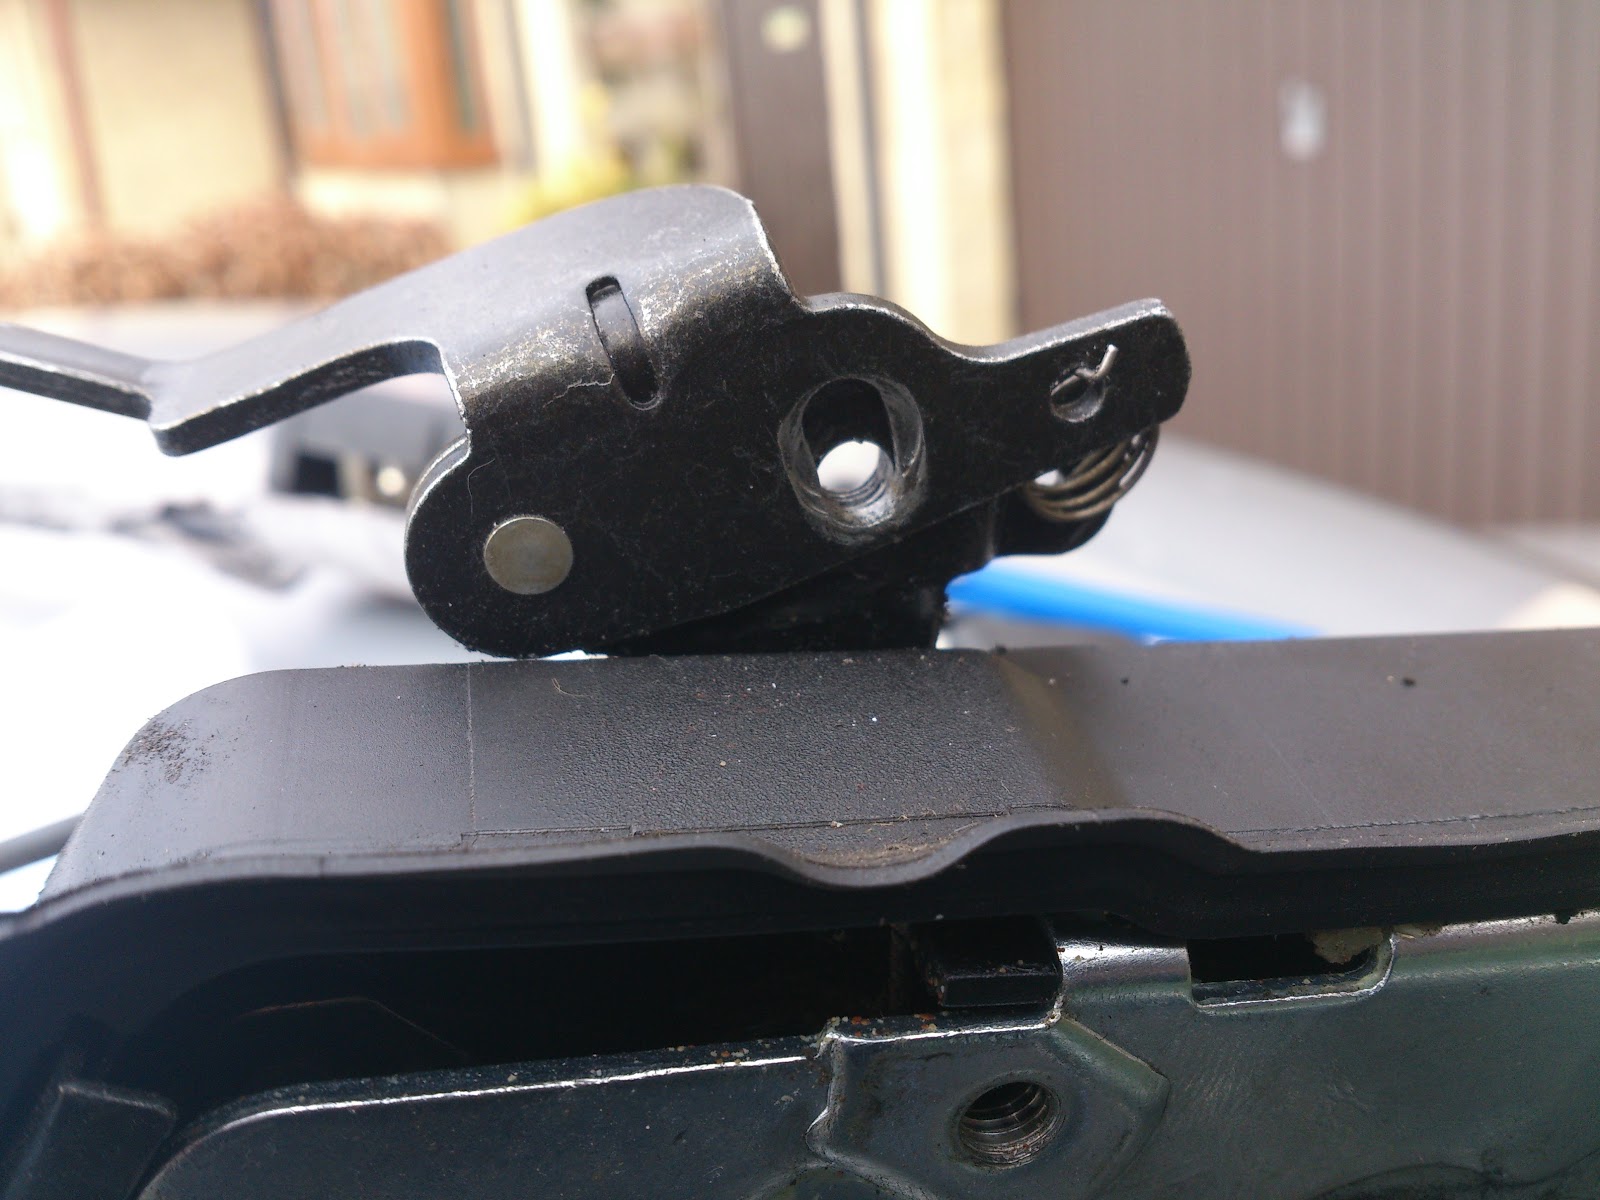
The famous bolt goes through the two parts and the it had threaded in the hole so wasn't holding it tight in position. This meant when the lever was pulled it didn't actually move enough to activate the unlock feature.

Couple of options that I could see, put something through the little holes where the spring is
Eg.
This worked but it effected the spring and I didn't have anything I felt comfortable fitting and keeping in place.

The next option was to screw and bolt something in place of the Allen bolt to keep it tight. I tried this and it still slipped and left a non function outcome..

The next option was to put something in the hole to keep the travel firm. Que a kitchen blow torch and solder and a small bolt that just fitted in the gap. 
 
I soldered it in place and then fed a screw that was just wide enough and put a panel behind to secure it. Tested it out and it worked.


I then refitted in the reverse. I'd almost recommend putting the internal handle cable on first as this caused a head ache trying to refit afterwards with the lock in situ.
Then connect the plug back on it. 

Ensure the lever bit is in the right place before bolting it back together. I didn't so had to re adjust which was not ideal... 
 Here is it now... 


Getting the cold shoulder (or not....)

Since owning the car, the air conditioning has never worked. Upon assuming it was low on freeon, I called out the company I'd been recommended to use to top it up.
When they tried to top it up it didn't work. They discovered that the pipe from the condensor  to compressor had a hair line crack and it was escaping out if this.

Over time I lived with this and suffered hot summers.

Well I spotted a cheap replacement pipe on eBay and while it didn't seem by description to be the right one, I took a punt as it looked spot on..

To replace this you will need:

Socket set
6mm Alan head
O rings for the new pipe
Thread lock for the bolts

First you need to remove the old pipe, this involves removing the two 6mm bolts from each end.
The one attached to the condensor is easy as it is at the front top of the engine bay. The one on the compressor is a little more tricky. There is just enough space to get a small ratchet in there.


Once off slide the ends out. There are guide pins to help the seating of it.

This is the old broken pipe


Now it's a simple case of re fitting the new one complete with o-rings.

Also put some thread lock on the bolts.

Once done just call out the air con people to re-fill it up.

Interestingly on these cars there is a sensor that checks if the pressure is too low and won't activate the compressor.

Looking forward to the summer now!

Forgetful seat?

This is a little bit of information for anyone with the BMW E46 memory seats.

They are great, very useful if you have more than yourself that drives the car.

I had a couple of settings for getting in and out the car so not to rub the bolsters so much causing unwanted wear.

Now there were a couple of times when I felt that the seats were not functioning right and that it had forgotten the positions.

After posting a question on the Bimmerforums I was informed as to how they actually work!

Saving a setting
To save a setting on them get the mirrors and seat into the position you desire.
Press the big red button and it will light up. Now press the number you want to assign it to (one to three).

To retrieve settings
Either put the key in the ignition and turn to position one then press the number you desire. The seats will automatically move and the mirrors will adjust too.
You can also do this without the key in, however the door MUST be open.

While the engine is running you must hold down the number you want to adjust. I assume this is done so you don't crush yourself with your seatbelt on.

If you go to a BMW dealer you can have it set to go to position one when the car is unlocked.

Faulty wheel speed sensor

BMW E46 DSC, what a wonderful invention. Until it stops working and your light stays permanently on.

One morning I went to the car, turned her on and the light wouldn't go off, for some reason it decided to fail. After some reading on-line I discovered this is a common problem on the E46 where the wheel speed speed sensor can trigger the DSC light due to failing, or being dirty.

Seemed like a pretty straight forward task, so started looking for a replacement.
1st stop was ebay, and £20 later we have a new sensor.

I've taken some pictures below to outline the task in hand.

1) Parked car on flat surface.


2) Jack the car up enough to put on axle stands

3) Soak the bolt in WD-40 or similar. Bear in mind the bolt holding the sensor in has been there for donkeys!

4)Remove the wheel

5)Here is the sensor in situ with the bolt removed.

Here is the offending bolt, please note it is a hex bolt, so ensure you use the correct size as it can easily lose it's head!

This is where it all started to go wrong...

The sensor was stuck firmly in the hub. No amount of persuasion would move it. So the hammer came out to support the cause.

In the end, the sensor broke off inside the hole, which wasn't a bad thing, as it was being replaced anyway. I just had to ensure the sensor left no bits behind in the hub, as this cold cause problems even when the new one is fitted.

So after all of the wheel speed sensor is removed it was then the task of fitting the new one. I must admit I thought this would be the easier side of the task... How wrong was I!?

The new sensor I had seemed to be too large for the hole. Even after light sanding of the hole it didn't want to go in at all. I assumed it was the right sensor as they all seemed to be standard. I even sanded down the sensor unit itself to try to aid it. This still didn't work.

So back to the internet to see if there WERE in fact different units. After some research it appears there are two types. Although the sizes of them seem vague.

On the RealOEM site it states the following:

Up to September 2000 it is part number 34521164651

From September 2000 there are two part numbers. The left hand unit is 34526752681, and the right hand unit is 34526752682.

My car being a 2000 reg model really didn't help matters!

I figured due to it being an eBay item there could be some confusion, so off to GSF to get the right one!

So with a new speed sensor in hand I thought it would be straight forwards. This was still incorrect and the new speed sensor was still too big.

I decided to tap it in with a light hammer. It started to go in which was a good sign. So I bolted it in and hoped the light would go off after a while.
This didn't happen, so I thought the light would need re-setting. I went to the garage to have this done and it still stayed on.

The mechanic tried taking out the sensor I'd fitted but it wouldn't come out.
This unit too broke off in the hole.

After much effort on the mechanics behalf, the old eBay sensor I had was fitted. He had to grind a hell of a lot of rust from the hole in the hub to get it to fit nicely.

Once fitted the light was re-set and we're back to having a functioning DSC system once again.

BMW Signature test

Thought it about time I made a signature to use on the BMW forums.

Testing to see how it comes out :-)

New car...

Bit off topic, but went round to the parents house today and was told they went up in the loft to find something. While up there they found one of my old toy cars.

Here it is, the old Z1. Quality, the doors even go down too!


and

Farewell old friend

Time has come to say good bye to the old "Ultimate Driving Machine". It proved too much hard work to sell so ended up being taken away for much less than it should. Gutted.

Why does my BMW beep when I turn it on?

Q: Why does my BMW beep when I turn it on? A: When the temperature is below 37 degrees F (3 degrees Celsius) this is a safety feature which ...